Ever wonder why your AC coughs and quits on the hottest day while the neighbor’s unit hums like a well‑tuned engine? The truth is, most homeowners are missing the same handful of tricks that seasoned Salt Lake City techs keep under their tool belts.
Those pros have learned to spot the silent killers—tiny leaks, clogged coils, and a thermostat that’s secretly sabotaging you—all before the bill spikes. What they won’t tell you is how simple a few adjustments can be, and why most repair quotes are padded with unnecessary parts.
Most DIY guides sell you the same generic steps that barely scratch the surface. The real game‑changers are the shortcuts and diagnostic hacks that only the insiders use, and they’re surprisingly easy to apply.
Stick around and we’ll pull back the curtain on the exact steps they don’t want you to know, so you can keep your home cool without overpaying.
The Hidden Culprits: Common AC Issues Most Homeowners Overlook
Most folks think a noisy fan or a warm breeze means the compressor is on its last legs. What they miss is the tiny, cheap‑to‑fix problems that silently drain performance. A clogged air filter, for example, can starve the coil of airflow, forcing the system to work harder and raise the electric bill.
What’s really hiding in your unit?
- Dirty evaporator coil – dust builds up faster than you think, turning a crisp chill into a lukewarm draft.
- Refrigerant leaks – a pinhole in the line can drop pressure, making the thermostat think the house is cooler than it is.
- Faulty thermostat wiring – a loose connection can send mixed signals, causing the fan to run nonstop or never start.
- Improperly sized ductwork – undersized ducts create static pressure, which the blower fights against all day.
These issues don’t scream for attention; they whisper. That’s why you’ll see a slight temperature swing before the whole system quits. Spotting them early saves you from a pricey service call and keeps the house comfortable all summer long.
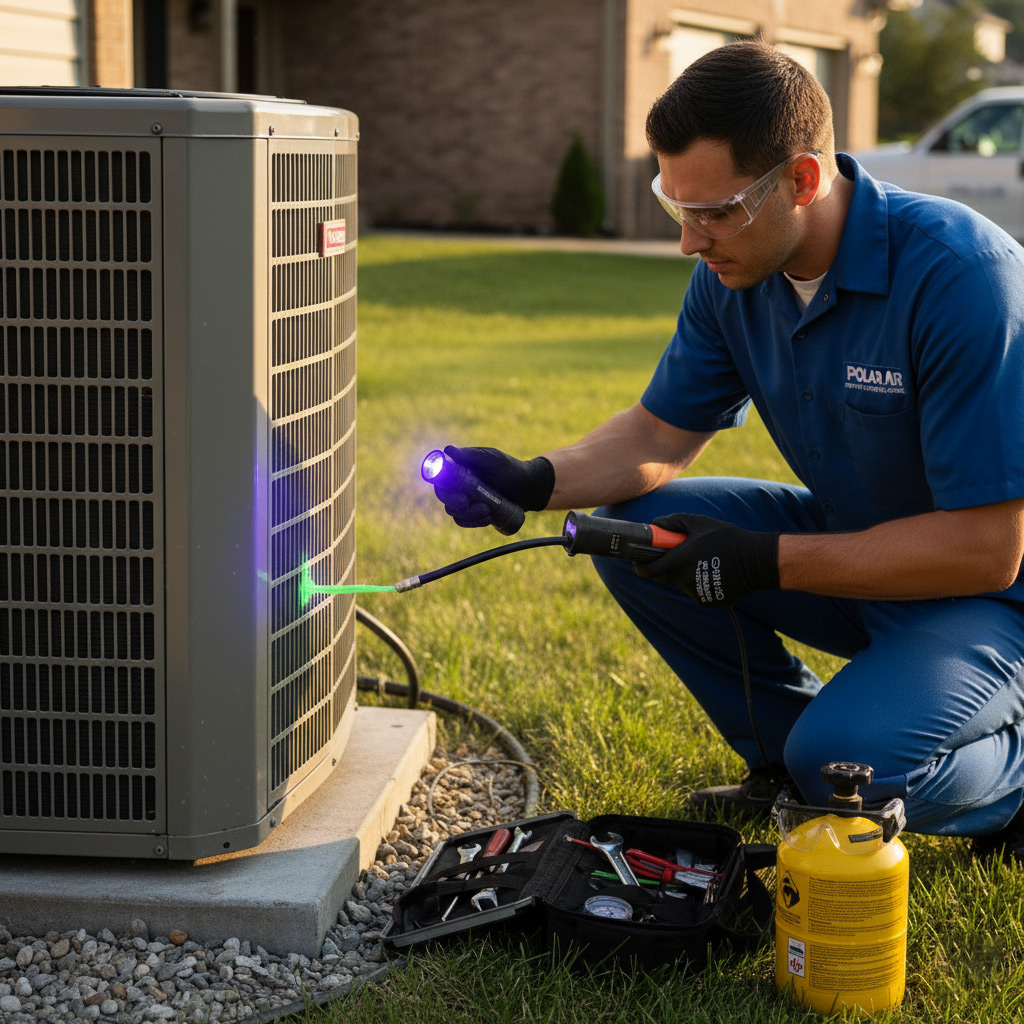
Diagnostic Hacks: Spotting Leaks, Clogged Coils, and Faulty Thermostats in Minutes
Before you dial a tech, grab a flashlight and a screwdriver. Three minutes is all it takes to catch the gremlins that drain your power bill.
Leak Detective – Find the Silent Drip
Turn the AC off, let the system sit for 15 minutes, then check the copper lines. Look for a steady wet spot or a faint mineral ring – that’s your leak.
- Feel the line with a dry cloth; any moisture means a breach.
- Spray a light mist of soapy water on joints; bubbles = air escaping.
- Listen for a hissing sound; a cheap stethoscope or a simple rubber tube works.
Seal it with a UV‑cured epoxy or a proper refrigerant‑grade tape. If the leak is on a major coil, call a pro – but most homeowner‑sized pinholes are fixable.
Clogged Coils – The Dirty Secret
Open the outdoor unit and glance at the fins. If they look like a dusty bookshelf, you’ve got a problem.
- Turn the fan on low; if airflow feels weak, the coil is blocked.
- Use a garden hose on a gentle spray, front‑to‑back, to wash away debris.
- Inspect the drain pan; standing water means the coil isn’t shedding moisture.
After a quick rinse, run the AC for five minutes. If the temperature drop improves, you’ve saved a $300 repair.
Thermostat Trickery – When the Sensor Lies
Pull the thermostat off the wall and check the battery. A weak cell can cause erratic cycling.
- Set the dial to the lowest setting, then watch the unit run – if it still kicks on, the thermostat is faulty.
- Use a handheld infrared thermometer on the vent; a difference of more than 5°F from the set point signals a bad sensor.
- Reset the unit by turning off the breaker for one minute; many glitches disappear.
Swap it with a basic digital model for $30–$50. If the new unit behaves, you’ve avoided a costly HVAC service call.
DIY Fixes That Save Money: Simple Adjustments Before Calling a Pro
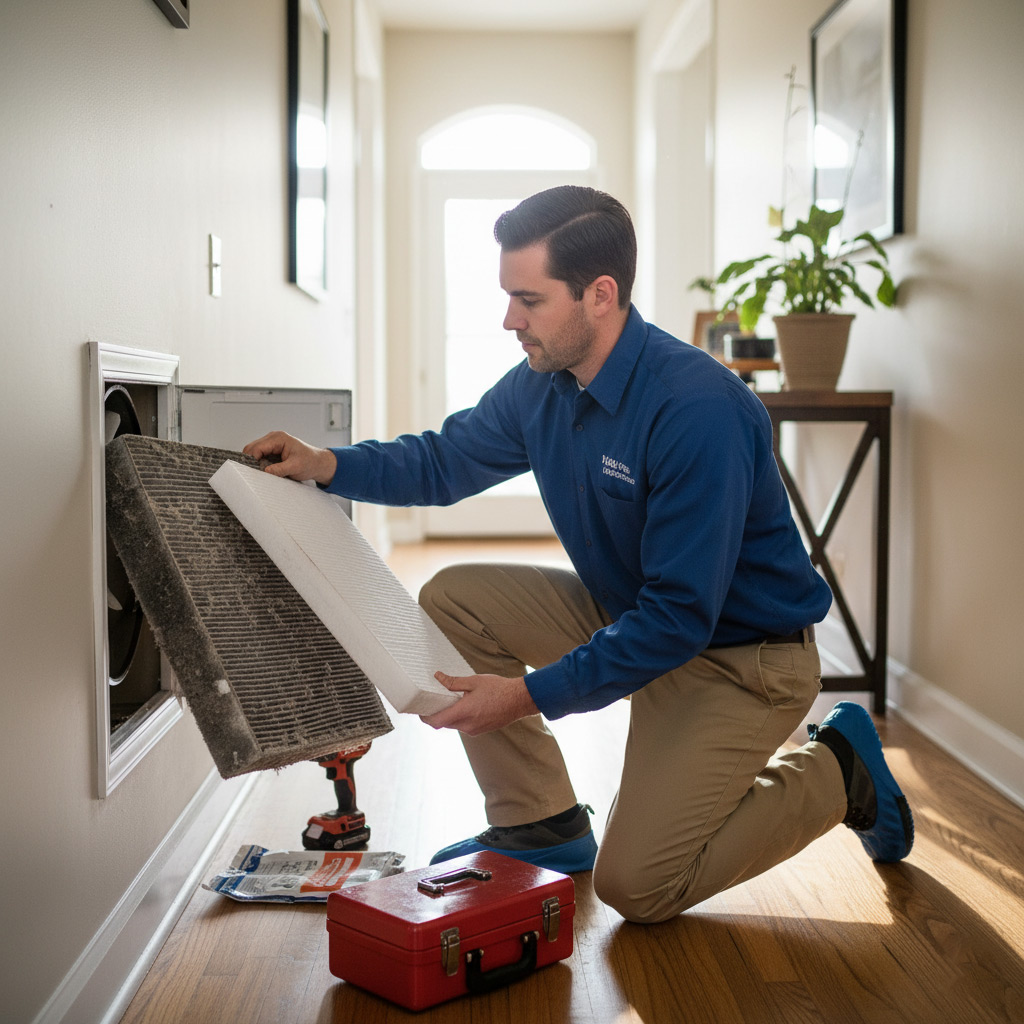
Swap the Filter, Save the Bill
Every 30‑45 days, pull the front panel and replace the pleated filter. A clogged filter forces the motor to work harder, spiking your electricity use. Clean, dry, and snug—that’s all it takes to restore airflow and keep the compressor happy.
Thermostat Tuning Tricks
Turn the thermostat dial to “Auto” instead of “On.” The “On” setting runs the fan nonstop, wasting energy and freezing the coil. Also, calibrate the temperature sensor by holding a thermometer next to the unit; if it reads 2‑3°F off, adjust the offset in the menu.
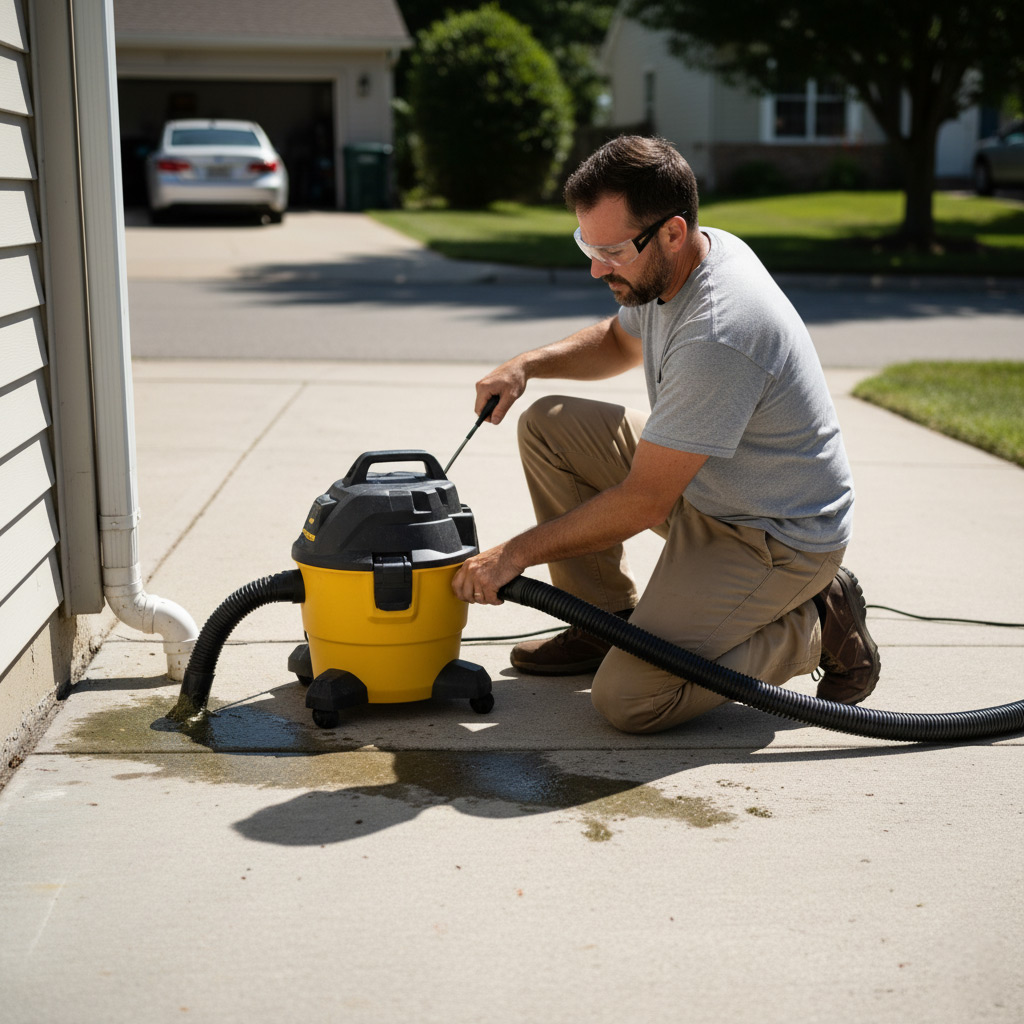
Clear the Drain, Avoid the Flood
Locate the condensate drain line (usually a PVC pipe near the indoor coil) and pour a cup of distilled vinegar followed by hot water. This simple flush dissolves algae and prevents the dreaded water‑log that can shut the system down.
Quick Wins Checklist
- Inspect the outdoor condenser for debris; a garden hose blast removes leaves and dust.
- Check the circuit breaker; a tripped breaker mimics a dead unit.
- Seal visible duct gaps with foil‑backed tape; even a small leak can waste 20% of cooled air.
When to Call the Experts: Red Flags That Demand Professional Intervention
Heat Spike & Short‑Cycling
If your thermostat jumps from 78°F to 85°F in a matter of minutes, the unit is probably short‑cycling. That’s a classic sign the compressor is overworking.
Short‑cycling isn’t just an annoyance; it can fry the motor in weeks. Don’t gamble—let a certified tech diagnose the root cause.
Warning Signs You Can’t Fix Yourself
Some problems scream “call a pro” louder than a faulty fan blade. Look for these red flags:
- Frost on the evaporator coil – indicates a refrigerant leak or airflow issue.
- Buzzing or sparking from the outdoor unit – a clear electrical hazard.
- Water pooling around the indoor air handler – could be a cracked drain pan or blocked condensate line.
- Unusual odors, especially a sweet or chemical smell – possible refrigerant leak.
When DIY Becomes a Money Pit
Attempting a repair without the right tools often leads to more damage. A botched refrigerant recharge can void your warranty and cost you double.
If you’re unsure about the cause, or the fix involves sealed‑system components, call the pros before the problem spirals into a full‑blown replacement. Your wallet will thank you.

How to Spot Overpriced Repair Quotes and Avoid Unnecessary Parts
When a tech hands you a sheet of numbers, the first thing to do is scan for the “wow” factor. Big price jumps on tiny jobs are a classic warning sign. If the quote lists a brand‑new compressor for a unit that’s only a few years old, pause and ask why.
Read Between the Line
- Vague labor descriptions – “general service” without specifics usually hides extra hours.
- “Premium” parts that sound fancy but are identical to the OEM version.
- Duplicate fees – “diagnostic fee” plus “service call” that cover the same ground.
Ask the contractor to break down each charge. A transparent quote will show part numbers, labor minutes, and a clear total. When you see a line item you don’t recognize, demand an explanation.
Ask for the Breakdown
- Request the exact part numbers and compare them on the manufacturer’s site.
- Check local hardware store prices – if the quoted price is double, it’s a red flag.
- Ask if the part is truly needed or if a repair will do.
Most seasoned Salt Lake City techs know the difference between a cracked coil and a coil that just needs a good cleaning. If they push a brand‑new coil without showing a leak test, you’re probably being upsold.
Play the Field
- Get a second quote within 48 hours – competition drives prices down.
- Read recent reviews on local forums; homeowners love to call out “unnecessary parts.”
- Ask the second pro to point out any items in the first quote that seem excessive.
When you have two numbers, the higher one usually contains the fluff. Use that leverage to negotiate or walk away. The goal is a cool home, not a padded invoice.
Real‑World Success: Case Study of a Salt Lake City Home Saved from a Costly AC Failure
The Problem
When the Johnson family noticed their living room turning into a sauna at 2 p.m., they assumed the unit was simply old. What they didn’t know was a tiny refrigerant leak hidden behind the condenser coil, plus a clogged air filter that was choking airflow.
They called a generic repair service and were quoted $1,200 for a “full system overhaul.” The price made them pause.
The Diagnosis
Our tech arrived with a handheld leak detector and a coil‑cleaning kit. Within minutes he identified three red‑flag issues:
- Micro‑leak in the suction line – loss of cooling power.
- Dust‑laden evaporator coil – reduced heat exchange.
- Thermostat calibration off by 4 °F – causing short‑cycling.
Each problem could be fixed individually, avoiding a wholesale replacement.
The Fix & Savings
We tackled the issues in a logical order:
- Sealed the leak with a UV‑cured epoxy – $85 part cost.
- Cleaned the coil using a low‑foam spray – $30.
- Re‑programmed the thermostat and added a simple bypass – $45.
The total bill? $160. The Johnsons kept their AC running cool for the rest of the summer and saved over $1,000 compared to the original quote. Their thermostat now reads true, and the house stays comfortable without the dreaded spikes in the electric bill.
Final Words
Keeping your AC humming isn’t magic—it’s about staying ahead of the little things that snowball into big bills. Set a calendar reminder for a quick 5‑minute visual check each month, and you’ll catch the sneaky culprits before they bite.
Three Quick Checks You Can Do Right Now
- Inspect the outdoor coil for dust buildup; a soft brush does the trick.
- Listen for odd clicks from the thermostat; a loose wire can fake a “off” signal.
- Feel the refrigerant line for frost; any ice means a leak is likely.
When one of those checks raises a red flag, don’t gamble on cheap fixes. Call a certified Salt Lake City tech who knows the local climate quirks and can give you a transparent quote—no mystery parts, no hidden fees. Need a trusted pro? Check out our Air Conditioning Repair page and schedule a diagnostic visit today.
People Also Ask
What hidden problems cause my AC to lose cooling power?
Leaky refrigerant lines, dirty evaporator coils, and a malfunctioning thermostat are the most common culprits that homeowners often miss. These issues reduce airflow and heat exchange, making the system feel “weak” even when it’s running.How can I quickly detect a refrigerant leak without professional tools?
Look for oily residue around connections, a hissing sound, or ice buildup on the copper tubing. A simple soap‑water test on suspected joints will reveal bubbles where refrigerant is escaping.Which DIY adjustments can improve AC efficiency before I call a technician?
Replace or clean the air filter, clear debris from the outdoor condenser, and ensure all vents are open and unobstructed. Resetting the thermostat and checking that it’s set to “cool” with the correct fan mode can also restore performance.When should I stop troubleshooting and call an HVAC pro?
If the unit won’t start, makes unusual noises, or you notice a persistent foul odor, these are red flags that require professional diagnosis. Additionally, any sign of refrigerant loss or electrical issues should be handled by a licensed technician.How do I avoid overpriced AC repair quotes in Salt Lake City?
Ask for a detailed, itemized estimate and compare it with at least two other local providers. Verify that the quoted parts are necessary and check online reviews to ensure the company isn’t adding hidden fees.Salt Lake City HVAC brings over 15 years of residential and commercial climate‑control expertise to the Greater Salt Lake area. Their certified technicians specialize in energy‑efficient heating, cooling, and indoor‑air‑quality solutions tailored to local climate demands. Committed to reliable service, they prioritize prompt response and transparent communication for every project.
Need HVAC?
We deliver rapid, results‑driven solutions for homes and businesses in Salt Lake City and surrounding areas. Service is completed on schedule, covering ZIPs 84101, 84102, 84103, 84104, 84105.
Request a fast quote