
You’ve probably heard whispers that a proper HVAC design in Salt Lake City can cost a fortune – but most of those stories are stretched thin. The truth is, the price tag isn’t a mystery; it’s a math problem most homeowners never get to solve.
From the altitude‑induced load calculations to the quirks of older homes, every factor adds a line item that can surprise you at the invoice. And while some contractors throw in “premium service” fees, a savvy buyer can separate the necessary from the fluff.
Ready to see the exact numbers that should be on your spreadsheet and learn the shortcuts pros use to keep costs honest? Keep reading and you’ll walk away with a clear roadmap for budgeting your next HVAC design.

Understanding the Core Components of HVAC Design Costs in Salt Lake City
Before you stare at a quote, you need to know what you’re actually paying for. In Salt Lake City the design fee isn’t a single line item; it’s a collection of calculations, drawings, and approvals that together shape the final price.
What makes up the price tag?
- Load calculations – the math that tells you how much heating and cooling a home truly needs.
- Duct and distribution design – sizing, routing, and sealing the air pathways.
- Equipment selection – choosing a furnace, heat pump, or air handler that matches the load.
- Control systems – thermostats, zoning panels, and smart‑home integration.
- Permits and paperwork – city inspections, energy compliance, and paperwork handling.
Each of these pieces carries its own labor and material cost, and the sum can swing wildly depending on house size, age, and the level of detail you demand. Knowing the components lets you spot a reasonable quote from a padded one before the contractor even lifts a wrench.
How Altitude and Climate Influence Load Calculations and Pricing
Altitude’s Hidden Impact
Salt Lake City sits at roughly 4,300 feet above sea level, which means the air is thinner and carries less heat. That forces HVAC designers to upsize furnaces and boilers just to keep rooms comfortable.
- Lower air density = reduced heat transfer efficiency
- Higher BTU requirements per square foot
- Potential need for variable‑speed blowers to maintain airflow
Salt Lake’s Weather Rollercoaster
The city’s climate swings from sub‑zero winters to scorching 100°F summers, with occasional dry spikes that throw off humidity calculations. Each season adds a layer to the load equation, and designers must factor in solar gain from the high‑desert sun.
- Winter: longer heating season, higher furnace capacity
- Summer: intense sun, larger AC tonnage
- Dry air: increased evaporation load, impacts dehumidification needs
Price Tag Ripple Effect
When altitude and climate push the numbers up, the bill follows suit. Bigger units, more robust ductwork, and extra controls translate directly into higher design fees.
- Equipment cost rises 10‑20 % for high‑altitude specs
- Labor spikes because installers must calibrate airflow precisely
- Permits may cost more if the system exceeds local energy‑code thresholds
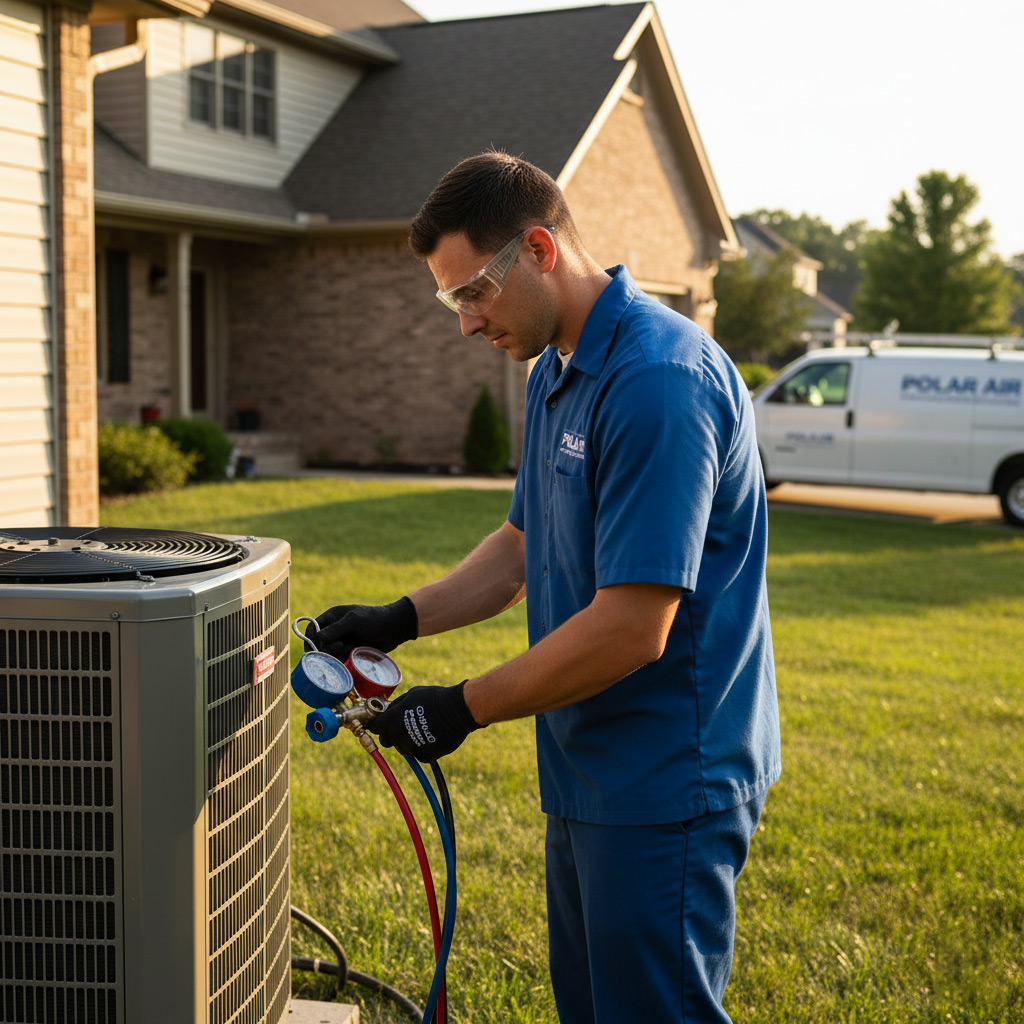
Breaking Down the Line Items: Equipment, Labor, and Permits
Before you sign anything, demand a line‑by‑line estimate. Seeing the numbers forces the contractor to justify every charge, and it gives you leverage to negotiate.
Equipment
What you’re really paying for is the hardware that will survive Salt Lake’s winters and summer spikes.
- Unit size – oversized units waste money and energy; undersized units leave you shivering.
- Variable‑speed blower – adds $300‑$600 but cuts run‑time costs.
- Smart thermostat – $150‑$250, often a rebate from the utility.
- Controls & zoning panels – $200‑$500 per zone, essential for historic homes.
Labor
Labor isn’t just “hands on deck.” It’s the expertise that translates a load calculation into a working system.
- Design engineer fee – $0.10‑$0.25 per square foot of conditioned space.
- Installation crew – $75‑$120 per hour, plus travel time for mountain‑side jobs.
- Testing & balancing – $200‑$400, ensures airflow meets the design.
Permits
Salt Lake City requires paperwork you can’t skip. Skipping it means fines, re‑work, and headaches.
- Building permit – $150‑$300, based on system size.
- Mechanical permit – $100‑$200, covers ductwork and venting.
- Inspection fees – $80‑$150 per visit, usually two visits for a full install.
Hidden Fees and “Premium Service” Add‑Ons to Watch Out For
Common Hidden Fees
Many contractors slip a design surcharge into the final bill, claiming it covers “advanced calculations.” In reality, it’s often a blanket fee that could be zero if the engineer already did the work.
Watch for these line items:
- Travel mileage – billed per mile even if the site is downtown.
- After‑hours premium – a 25% markup for a call that happens at 7 pm.
- Permit handling fee – sometimes a separate charge from the actual permit cost.
Premium Service Add‑Ons That Drain Your Wallet
“Premium service” sounds fancy, but it’s usually a profit booster. Companies love to bundle things you don’t need.
Typical add‑ons include:
- Priority scheduling – you pay extra to jump the line, even though most jobs start within a week.
- Extended warranty – a 5‑year plan that overlaps with the manufacturer’s 10‑year warranty.
- Custom branding – a logo on the thermostat that adds $200 for no real benefit.
How to Keep the Extras in Check
Ask for an itemized quote before any work begins. Every dollar should have a reason.
If a fee feels vague, demand a justification or walk away. The right contractor will gladly explain each charge without a sales script.

Strategies to Reduce Design Costs Without Compromising Efficiency
Shop the market, don’t settle for the first quote
Pull three to five estimates from reputable firms and line them up side‑by‑side. You’ll spot the outliers fast and force each contractor to justify every dollar.
Ask each provider to break down the design fee into hourly labor, software, and overhead. When a number looks inflated, you have leverage to negotiate.
Leverage pre‑engineered packages
Many manufacturers offer “ready‑made” load calculations for typical Salt Lake City homes. These packages can shave 20‑30% off the engineering bill.
- Confirm the package matches your home’s square footage and roof pitch.
- Ask the installer to verify the numbers on site – it’s a cheap sanity check.
- Use the saved cash to upgrade duct sealing or a higher‑efficiency thermostat.
Trim the “nice‑to‑have” add‑ons
Premium service fees often hide things like “priority scheduling” or “extended warranty paperwork.” Those are optional, not mandatory.
Focus on the essentials: accurate load calculation, proper duct design, and code‑compliant permits. Anything beyond that can be added later if you truly need it.
Case Study: Budget‑Friendly HVAC Design for a Historic Salt Lake City Home
When the Miller family bought a 1905 bungalow on 9th & Main, the first thing they heard was “you’ll need a full‑blown system and it’ll break the bank.” I walked in, measured the rooms, and said, “Let’s keep it simple and keep the price low.” The result? A custom‑sized, high‑efficiency unit that fit the house’s charm without a $15,000 price tag.
What We Did Differently
- Right‑size the load – Instead of the generic 5‑ton rule, we used Manual J calculations that accounted for the high‑altitude air density and the home’s original plaster walls.
- Reuse existing ductwork – The original ducts were clean and well‑sealed. We only added two short runs to reach the upstairs bedroom.
- Choose a modular heat pump – One that can handle both heating and cooling, eliminating the need for a separate furnace.
By focusing on these three moves, the Miller’s saved roughly $4,200 on equipment and $1,800 on labor. The final bill was $9,950, well under the $14,000 estimate they’d heard from other contractors. The house stayed true to its historic vibe, and the family got a system that pays for itself in a few years.
Final Words
Now that you’ve got the numbers, the hidden fees, and the shortcuts laid out, it’s time to stop guessing and start planning. The math isn’t magic; it’s a checklist you can own, and the savings start the moment you walk away from “premium” fluff.
Next Steps to Lock In a Fair Price
- Ask for a detailed load‑calculation report before any quote.
- Compare at least three bids, and match line items side‑by‑side.
- Verify that permits are included – no surprise fees later.
When you’re ready to move forward, pick a contractor who’s transparent about every dollar and who respects the unique altitude challenges of Salt Lake City. For more guidance on design fundamentals, swing by our HVAC System Design page and keep the momentum going.
People Also Ask
What factors determine HVAC design costs in Salt Lake City?
The primary factors include the size and layout of the home, local climate conditions, altitude-related load calculations, equipment selection, labor rates, and required permits.
How does Salt Lake City’s altitude affect HVAC pricing?
Higher altitude reduces air density, which can increase the heating load and require larger or more efficient equipment, raising both equipment and design fees.
Are there hidden fees in HVAC system design contracts?
Yes, common hidden costs are “premium service” add‑ons, extra duct sealing, custom controls, and unexpected permit fees that may not be listed in the initial estimate.
Can I lower HVAC design costs without sacrificing efficiency?
Absolutely—opt for standard‑size equipment, streamline ductwork, schedule the design during off‑peak seasons, and compare multiple quotes to find the best value.
What should I look for in a case study of a budget‑friendly HVAC design?
Focus on projects that used energy‑efficient equipment, simplified duct layouts, and leveraged local rebates or tax incentives to keep costs low while maintaining performance.
Salt Lake City HVAC brings over 15 years of residential and commercial climate‑control expertise to the Greater Salt Lake area. Their certified technicians specialize in energy‑efficient heating, cooling, and indoor‑air‑quality solutions tailored to local climate demands. Committed to reliable service, they prioritize prompt response and transparent communication for every project.
Need HVAC?
We deliver rapid, results‑driven solutions for homes and businesses in Salt Lake City and surrounding areas. Service is completed on schedule, covering ZIPs 84101, 84102, 84103, 84104, 84105.
Request a fast quote